SmartSDR v4.1.5 | SmartSDR v4.1.5 Release Notes
SmartSDR v3.10.15 | SmartSDR v3.10.15 Release Notes
The latest 4O3A Genius Product Software and Firmware
Need technical support from FlexRadio? It's as simple as Creating a HelpDesk ticket.
TeensyMaestro
Comments
-
Here is the sequence of steps:
Connect the Teensy to the computer using the USB cable. Start Teensy.exe. Have the file I sent last post unzipped and saved somewhere convenient. Using Teensy.exe, go to File, Open HEX File and select the file. Turn on Automatic Mode (Auto button highlighted in green) if it is not already on. Then push the little white button on top of the Teensy board to initiate the load.
Teensy.exe should bring this up:
If this is what you are already doing, maybe we can go on Skype or Zoom to debug further.
Len
0 -
That is exactly what I am doing. When I put my mouse over the file it says it is too big
0 -
WHEN I press the button the red light comes on on the board
0 -
0
-
0
-
Oh, I see where you are getting the message. I am not sure why that version is giving that message. A little earlier this evening I sent a new version zipped. Can you un zip it and give it a try? It should say that it is 6% used as opposed to too large. It may help to close Teensy.exe and restart it before loading the new file.
Len
0 -
Don't see the new zipped version??
0 -
0
-
When I download it it says it is 1.3 mb
0 -
Still says file too large
0 -
Yep, 1.34 MB is right. Does it still give the too large message?
0 -
Well, I guess the next step is the dreaded re-boot your PC to see if it behaves after that. In the meantime I will research why it might think that file is too big.
0 -
I have another idea... Can I send the unzipped version of the file to the e-mail address on QRZ.com?
0 -
I either have a bad cable or a bad unit as I can't even load one of the blink files on their site onto the board.
0 -
OK send unzipped file . . . Address is correct
0 -
Ah, OK. You can reset the board back to factory by pressing and holding the white programming button for 15 seconds. The red light will come on and stay lit for a while. When it is done, the led next to the programming button will start to blink at 1 Hz.
0 -
One other thing to try... If you have the Teensy board plugged into sockets on your protoboard, unplug it and try it that way in case there is a wiring error keeping it from loading.
0 -
Got it fixed . . . I was using a charge only cable
0 -
Fantastic! I am glad that is all it was. I will add this funny symptom to the troubleshooting section of the user manual. I am sure that you will not be the last to have this particular issue!
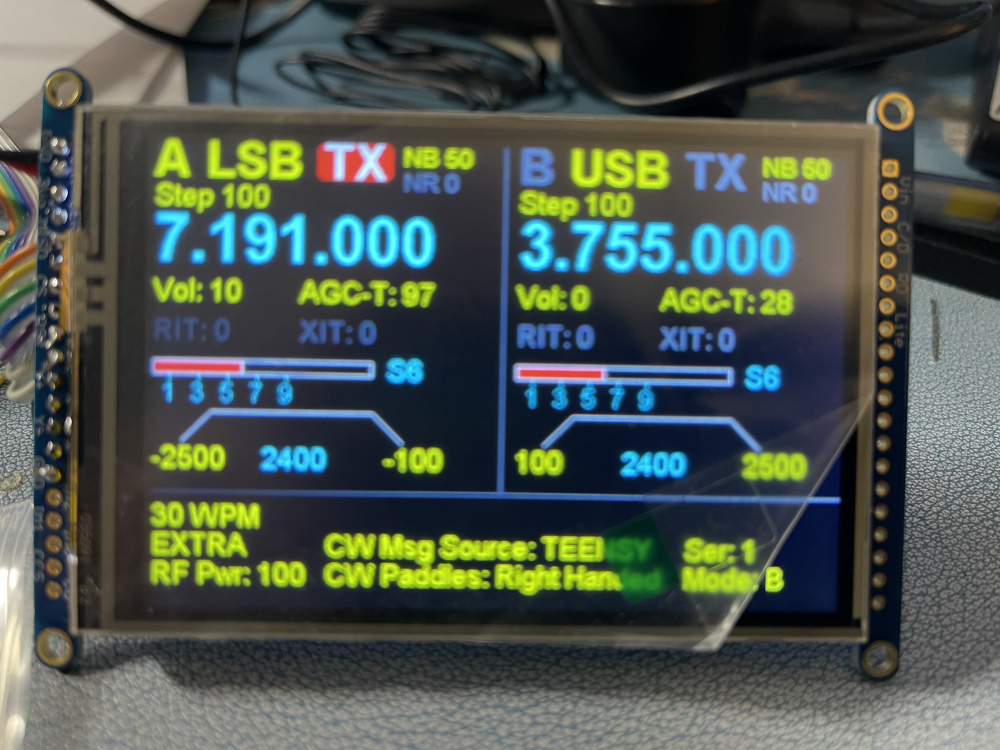
I got your e-mail with the pic of the screen - looks good! Before you add any (more) controls, I would suggest plugging it into the network with the radio (with SmartSDR running) and see if you get past the splash screen with the IP addresses and radio info on it. If it displays the radio properly, then you will be confident that the communications are good.
I saw your call on the screen, so the SD card is being read correctly, and has a valid MMConfig.ini file on it. All good progress!
73,
Len
0 -
Nice job Steve! You are way ahead of me. For those playing along at home... Steve sent me a pic of the screen successfully connected to the radio as I was composing the above message.
0 -
Its working
1 -
Hi I am rebuilding the full schematic in hopes of creating a PCB for the project. I am creating it on EasyEDA (JLCPCP - PCB fab). I will open up the project for anyone to access it and create PCBs, if it work out!. I have a couple of questions:
1) on the HXD837D I think I cant find where to connect "lite" pin 11
2) where is the power attached? Are you using the usb as the voltage source?
3) attached is the schematic for everything except the vfo encoders and switches, just haven't gotten there yet. Any comments / review would be appreciated
0 -
Hi Lou, this looks great!
1) I don't use the lite connection. If someone wanted to experiment with it, I think a **** on there could be used to control display brightness, but in actual use, I have not wanted to change it.
2) USB power. Once programmed, the unit can be powered from any 5V USB source - it does not have to be plugged into a computer. To upload the initial or subsequent versions of the firmware, it needs to be plugged into a computer.
3) I have not compared every connection to mine yet, but at first glance this looks excellent. I will take a look later today in more detail.
I did not show any bypass capacitors except for the ones on the key lines. As you do your layout, I think every encoder line and every switch line should have a .01 uf bypass cap. I have not added them to my own unit yet, but plan on doing so soon (maybe today...). The caps should be physically close to the Teensy board. Mine loses connectivity to the radio occasionally if I draw a static arc off my operating desk. I think the caps will help with that. While I am not experiencing RF problems, the bypass caps will certainly lessen the chances of problems there.
Some things to consider:
The SD card on the Teensy board needs to be reasonably accessible so that keyer memories and things like that can be easily changed in the field. In my layout, the SD card comes out from the back. Once you mount the Teensy on a PC board, it may be more difficult to figure out how to get at the card. Attached is a pic of how I did my back panel. The hole in the gray panel is where the SD card end of the Teensy board is. The pic is dark, but the SD Card is right there in the opening. I have thin fingers, so it is easy for me to get it in and out; that won't be the case for everyone.
The program button is on top of the Teensy board and can be hard to access. You may want to bring the Program (pin 53) signal out to a switch. With mine, I can reach my little finger in and press the switch. Most folks will not be able to do that (thin finger thing again...).
I did not make provisions for a power switch. The ON_OFF (pin 54) signal could also be brought out to a switch. A four second press of this button will power the unit down and a half second press will power it back up (causing a restart). This would be an advantage as a fail-safe way to restart the Teensy board without power cycling the unit. I have not tested this yet, but when I put the bypass caps in, I will test this feature.
When laying out the board, there will need to be cut outs for the VFO encoders. They should probably connect to the board with .1 inch headers.
The MUX boards and STMPE-610 board could probably be socketed so that they would be easy to install or replace. The only flying leads the the MUX boards would be the six memory buttons.
Thanks for doing this Lou, I will be interested to see the final product!
73,
Len, KD0RC
0 -
Thanks Len for the info... Is the source code available?
0 -
Hi Lou, I haven't yet decided what to do with the source. I have been thinking about putting it on GitHub with the rest of the project, but having supported software in my working life, I really don't want that headache. I enjoy helping people build the project as is, but am not interested in debugging code for others. So maybe the caveat will be help with the existing project and you are on your own if you mess with the source. In any event, I will think about it.
73,
Len
0 -
You could publish it on github and turn off bug reporting. Also state in the readme that you are releasing the code without support. That would allow others to fork the code and refine and add features
0 -
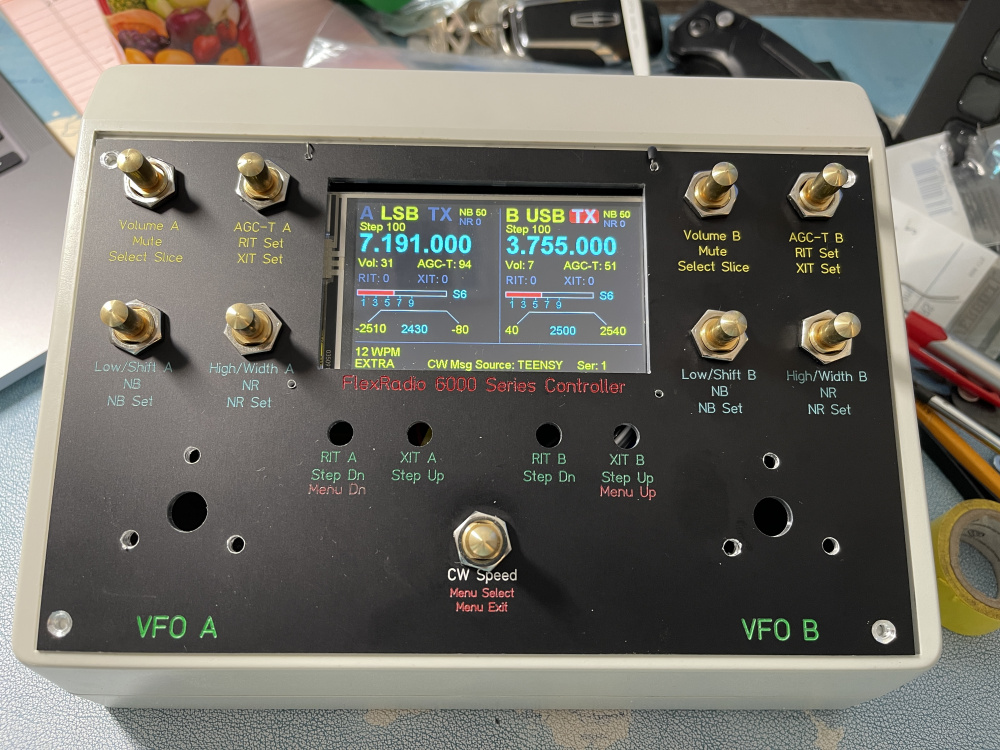
Getting it done Display is not mounted yet. VFO encoders not in yet. Waiting for parts
1 -
Wow Steve, that really looks nice! You are making some pretty quick progress now.
Len
0 -
Getting there. Waiting for the 2 multiplexers and the pb switches along with some display and encoder screws
0 -
Lou,
Here is a close up of the Teensy board showing the SD card; It's difficult for me to reach the reset button, but do-able.
0
Leave a Comment
Categories
- All Categories
- 383 Community Topics
- 2.1K New Ideas
- 639 The Flea Market
- 8.3K Software
- 145 SmartSDR+
- 6.4K SmartSDR for Windows
- 188 SmartSDR for Maestro and M models
- 434 SmartSDR for Mac
- 273 SmartSDR for iOS
- 261 SmartSDR CAT
- 200 DAX
- 383 SmartSDR API
- 9.4K Radios and Accessories
- 47 Aurora
- 276 FLEX-8000 Signature Series
- 7.2K FLEX-6000 Signature Series
- 958 Maestro
- 58 FlexControl
- 866 FLEX Series (Legacy) Radios
- 934 Genius Products
- 466 Power Genius XL Amplifier
- 342 Tuner Genius XL
- 126 Antenna Genius
- 304 Shack Infrastructure
- 213 Networking
- 464 Remote Operation (SmartLink)
- 144 Contesting
- 795 Peripherals & Station Integration
- 142 Amateur Radio Interests
- 1K Third-Party Software


